Copyright ©2025 Fabric | Xytech Help Document Version 1.13
Need Help? Start Here — Welcome to Xytech Help | Xytech Basics | Xytech Notable Features | Using the Help - Best Practices | Xytech Support Web Site
Layout Application
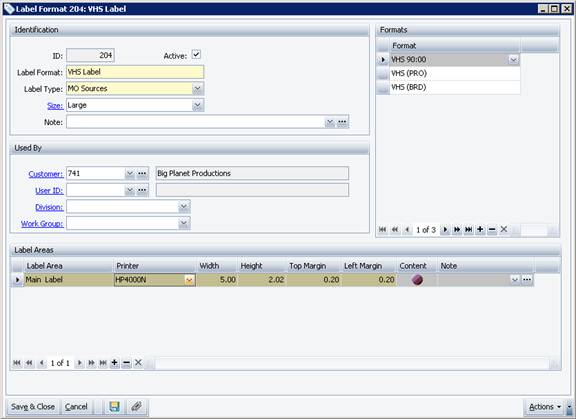
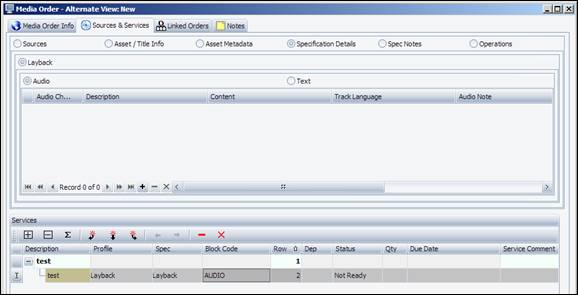
Application/Setup Window Layout Example
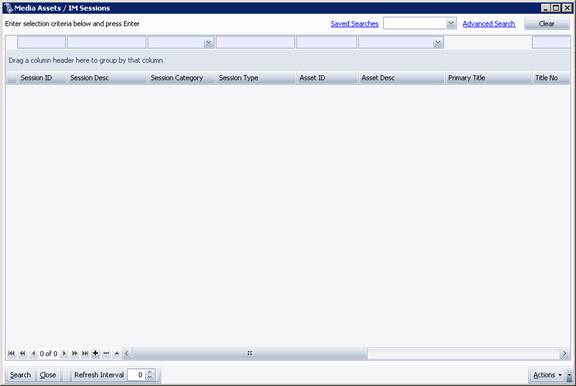
Search List Window Layout – Data Tab Page Example
The Layout Application allows you to create new User layouts and editing existing ones. Refer to the CREATE AND EDIT SCREEN LAYOUTS STEP-BY-STEP topic for details.
NOTE
Only those Users with access to the SmartClient will be able to create or edit Screen Layouts. Please direct requests to create or modify Layouts to a User with SmartClient access.
There are two types of layouts that you can create and edit: Application/Setup Window and Search List Window. Search List Window layouts are used to locate records for a given application and Application/Setup Window layouts are used to view, edit, and create individual records.
When you are creating or editing a Search List Window layout, the Layout Application will be divided into two tab pages: Data and Criteria.
- The Data Tab Page allows you to create the search list window that appears when users access the layout from the Modules pane.
- The Criteria Tab Page allows you to create the Criteria Window layout, which is accessed by users when the click the Advanced Search hyperlink in the upper-right corner of a search list window.
IMPORTANT!
Do not keep open the application or window you are currently working with. Close the application or window before using the Layout Application to create or modify a layout.
RIGHT MOUSE BUTTON MENUS
There are several right mouse button menus available in this application. Refer to the Help topics on each for details:
- FIELD BLOCK AREA right mouse button menu
- FIELD BLOCK AREA – FIELD right mouse button menu
- LIST BLOCK AREA right mouse button menu
- LIST BLOCK AREA – FIELD right mouse button menu
NOTE
To identify which layout is an Application/Setup Window versus a Search List Window, look to the Class Name Field in the LAYOUTS LIST WINDOW. If the value ends in the letters “List,” it is a Search List Window layout.
FIELD/BUTTON DEFINITIONS
![]()
Save & Close
Closes the window and saves any unsaved changes to the current session.
NOTE
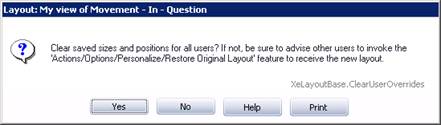
During the Save process, the system will issue a message that will allow you to reset any user-level customizations made to the current layout (e.g., custom window sizes, custom buttons, custom column positions in list blocks) so users will see the changes you made during the current session. If you do not reset these customizations, users may not see the changes you made to the layout.

- Selecting the Yes Button prompts the system to run the same process as the RESTORE ORIGINAL LAYOUT command available from the Layout Settings Button for all users.
- Selecting the No Button will still save your changes to the layout, but users will only see your changes if they do not have custom settings for the layout or if they manually run the RESTORE ORIGINAL LAYOUT command.
TIP!
As with many tools that allow you to create and edit content, it is a good idea to save your work as you go. Click the Save Button ![]() or the Save & Close Button periodically (e.g., every 15 to 30 minutes) to ensure that you don’t lose your layout designs if something goes wrong. You can access your new layout from the LAYOUTS LIST WINDOW.
or the Save & Close Button periodically (e.g., every 15 to 30 minutes) to ensure that you don’t lose your layout designs if something goes wrong. You can access your new layout from the LAYOUTS LIST WINDOW.
Cancel
Closes the window and disregards any unsaved changes to the current session.
Save 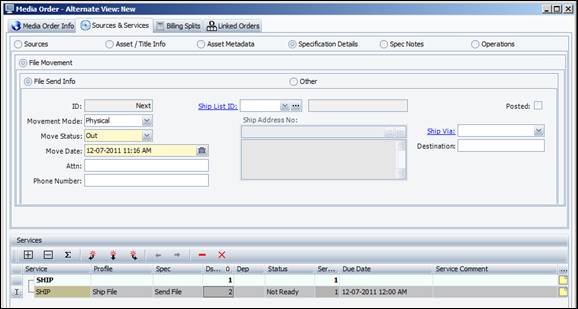
This button saves the current record.
NOTE
During the Save process, the system will issue a message that will allow you to reset any user-level customizations made to the current layout (e.g., custom window sizes, custom buttons, custom column positions in list blocks) so that users will see the changes you made during the current session. If you do not reset these customizations, users may not see the changes you made to the layout.
- Selecting the Yes Button prompts the system to run the same process as the RESTORE ORIGINAL LAYOUT command available from the Layout Settings Button for all users.
- Selecting the No Button will still save your changes to the layout, but users will only see your changes if they do not have custom settings for the layout or if they manually run the RESTORE ORIGINAL LAYOUT command.
TIP!
As with many tools that allow you to create and edit content, it is a good idea to save your work as you go. Click the Save Button ![]() or the Save & Close Button periodically (e.g., every 15 to 30 minutes) to ensure that you don’t lose your layout designs if something goes wrong. You can access your new layout from the LAYOUTS LIST WINDOW.
or the Save & Close Button periodically (e.g., every 15 to 30 minutes) to ensure that you don’t lose your layout designs if something goes wrong. You can access your new layout from the LAYOUTS LIST WINDOW.
Coordinates 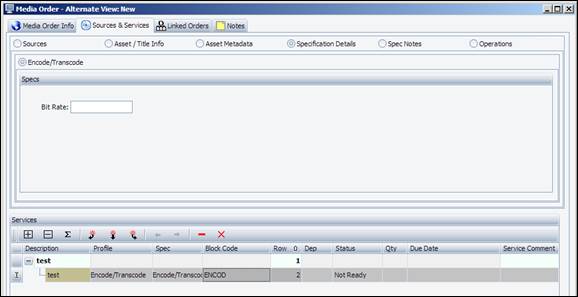
This field displays the X, Y coordinates of the currently selected block in relation to the upper left corner (0,0) of the block. Use this information when designing layouts; they can help you determine consistent block sizes.
Properties
Opens the LAYOUT PROPERTIES WINDOW for the current layout so you can establish layout settings, such as, the name of the layout and which users may use the layout when accessing its associated application or window.
Prompts
Opens the DOCUMENT PROMPTS WINDOW for the current layout so you can modify field prompts (label names) and drop-down list values as needed and create custom tooltips that appear when users hover over a field prompt.
Edit Saved Searches
This hyperlink will only appear if the current layout is a Search List Window document, which includes Report type layouts.
Opens the SAVED SEARCHES WINDOW for the current layout so you can view existing saved searches for the layout, whether they were made in the Layout Application or by users when interacting with the current layout at runtime. This window allows you to delete a saved search or change its basic properties (not the search parameters).
If there are no saved searches available for the current layout, the Saved Searches Window will be empty.
Refer to the Layout Mode command available from the LIST BLOCK AREA right mouse button menu topic for details on establishing default search values for the current Search List Window.
Actions
This button allows you to delete or duplicate the current layout. You can also choose the Customize Buttons command to set Actions menu commands into custom buttons on the layout. (Refer to the Actions menu Customization Area topic below for details.)
If you select Duplicate this Layout, a New Layout Window opens so you can modify the layout name before continuing with the process of creating a new layout (refer to the CREATE AND EDIT SCREEN LAYOUTS STEP-BY-STEP topic).
Actions Menu Button Customization Area
You can make select Actions menu commands appear as buttons by default on a layout for all users who access the layout much in the same way that users can create custom buttons on the fly per window (i.e., selecting the Customize Buttons command from the Actions Button). Refer to the BUTTON CUSTOMIZATION STEP-BY-STEP topic for details on how to customize buttons.
Creating Custom Actions Buttons Example
Action Buttons can also be defined as 'hot keys', allowing you to take certain actions by holding down the Control key and tapping the indicated key (e.g. use CTRL + S for a Save function). Refer to the CREATING A HOT KEY FROM A CUSTOM BUTTON topic for details on how to do this.
IMPORTANT!
All possible Actions menu commands for the selected document are available in the Customize Menu Window. This includes commands that will not display when users access the layout as a program window based on established business rules and data restriction. Buttons made from commands that do not display in a program’s Actions Button menu will also not display.
Commands may not display in a program’s Actions menu (nor as custom buttons) for several reasons.
One such reason applies to commands that are invisible until a record has met certain requirements as defined by the business rules. For example, the Recalculate W/O command in the BID MAINTENANCE APPLICATION'S ACTIONS BUTTON MENU only appears on approved bid records. Similarly, the Unapprove Bid command will only show on approved bids. If either of these commands are added as custom buttons to the layout, when users create a new bid, these custom buttons will be invisible until the new bid is approved.
Another reason applies to commands that are invisible unless fields from a particular table have been added to a layout. For example, the ORDER TRANSACTIONS WINDOW document includes order, job, media asset, etc. tables. Unless fields from those tables have been added to a layout, their associated Actions menu commands will not be displayed nor will custom buttons show.